14 Nov 2012
Too Cold for Tuck Pointing in Chicago?

Temps Should be Above 40 Degrees for Tuck Pointing in Chicago
Generally, tuck pointing in Chicago is best done when the surface material is above freezing and future temperatures are above 40 degrees. If you can’t wait until the weather gets warmer, you can try to keep the area warm enough using tarps and portable heaters.
If facing cold temperatures, there’s a possibility that the mortar won’t generate enough heat especially when wind and frost are a factor. While curing, ice crystals may form jeopardizing the mortar integrity. Last year the weather was so mild we were able to tuckpoint through December without any problems. If you think you would like to get the job done now, give us a call and we will assess the situation. If it’s best to wait until Spring, we’ll let you know.

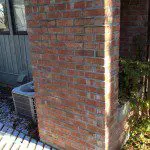
For example, a brick chimney with cracked mortar or a deteriorated chimney crown is a fairly minor repair. However, once masonry starts to deteriorate, the rate of deterioration grows exponentially.
Chicago’s freezing and thawing cycles work to turn small cracks into crevices, quickly. Other forces may be at work as well, including rusted metal adjacent the brick, incorrectly formulated mortar, and moisture trapped behind painted or improperly sealed brick.
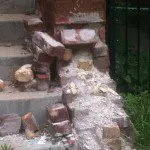
Left unattended, minor masonry problems can result in not only an unsightly appearance, but also in an unsafe structure that could potentially collapse or prevent proper ventilation. In the case of a chimney, a total rebuild may be necessary. Lack of knowledge about brick maintenance has serious consequences.
Sometimes the source of a masonry problem isn’t always obvious. For example, water that enters through a cracked chimney crown can leak down and cause problems elsewhere. Similarly, water in the soil can also move upward through capillary action. A masonry repair professional is trained to diagnose the source of the problem and provide a permanent solution.
If you are concerned, contact us and we’ll come out and take a look. An early assessment may prevent structural failure later.
06 Oct 2012
Why Masonry Caulking Can Fail

Problem 1: Caulking Doesn’t Adhere
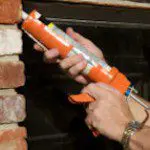
If the surfaces are not properly cleaned prior to the application, or joints are not cleaned out and tooled, the sealant may not adhere properly to the surfaces. Problems can emerge days, weeks or even months after the application.
Problem 2: Tears or Cracks in the Caulking
Poor joint design can result in tears within the caulk itself. Generally the design will call for a foam backer rod, or a specified ratio of width to thickness as well as proper tooling of the joints.
Problem 3: The Installer Misses a Spot
Caulking is subject to human error. Even a small break in the caulk can result in a leak.
Problem 4: Caulking Is Under Water
Constant exposure to water will cause caulking to fail prematurely. A professional tuckpointing contractor or building professional can diagnose structural issues which result from improper drainage. For example, a window sill or porch sloped the wrong way can keep caulking permanently wet.
Problem 5: Caulk Incompatibility
Sometimes different materials just don’t like each other. In certain situations, the caulk can react to another material that is present or to a substance used as a cleaner. It’s important to follow the manufacturer’s directions explicitly.
Because failures do occur, it’s important to check caulking regularly. And while caulking appears to be a simple task, the problems above demonstrate it can actually be quite complicated. A professional installation ensures the right materials, tools and techniques will be used to keep a tight seal for many years to come.
Not sure if you need new caulking? Give us a call.
12 Sep 2012
Donec At Mauris Enim Duis Untis
Quisque ligulas ipsum, euismod atras vulputate iltricies etri elit. Class aptent taciti sociosqu ad litora torquent per conubia nostra, per inceptos himenaeos. Nulla nunc dui, tristique in semper vel, congue sed ligula. Nam dolor ligula, faucibus id sodales in, auctor fringilla libero. Pellentesque pellentesque tempor tellus eget hendrerit. Morbi id aliquam ligula. Aliquam id dui sem. Proin rhoncus consequat nisl, eu ornare mauris tincidunt vitae
Read More
10 Sep 2012
Chimney Leaks Check List

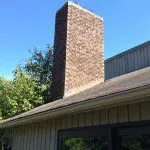
When talking to a tuckpointer about chimney leaks you may be asked how old the chimney is, what materials were used to build the chimney and how it was constructed. These three variables can reveal potential problem areas. The average homeowner may not know the answers but with a physical inspection, a tuckpointer can find out quick enough.
Check chimney materials
☑ The chimney crown is often an area where leaks can occur, especially if it is made of mortar rather than concrete. Mortar is not as strong as concrete and can absorb water as it deteriorates over time.
☑ The kind of brick and mortar used in the chimney is also a factor. Soft, porous brick is more likely to leak. Mortar mixed with too much sand can actually soak up water. Water repellant products can limit the impact and prolong durability.
☑ Chimney flashing is used in the area where the chimney and roof line meet. Flashing requires two layers of sheet metal. One layer covers the sides of the chimney and the other is embedded in the mortar joints (counter flashing) then folded down for further protection against moisture.
Check chimney condition
☑ Look for crumbling or missing pieces on the chimney crown. Structural damage needs immediate attention. Small cracks in the crwn can often be repaired with a sealant.
☑ Rainfall can gather in the flashing area causing leaks through the joint. This can be repaired with a sealant and mesh fabric to make the joint stron enough to repel water.
☑ For large cracks in the brickwork, tuckpointing with new mortar is recommended.
Chimney leaks can cause damage to a home. Understanding the problem is the first step to keeping your Chicagoland home in good condition. Finding someone who can repair the problem is essential and prudent.


